Hisense Portable Air Conditioner Manual: A Comprehensive Guide
Welcome! This detailed manual assists users in maximizing their Hisense portable AC’s performance‚ offering clear instructions and diagrams for optimal operation.
Congratulations on selecting a Hisense portable air conditioner! This appliance is engineered to provide convenient and efficient cooling‚ dehumidification‚ and air circulation for your comfort. This manual serves as a comprehensive resource‚ guiding you through setup‚ operation‚ maintenance‚ and troubleshooting.

Before using your new unit‚ please take the time to carefully read this entire manual. Understanding its features and following the provided instructions will ensure optimal performance‚ longevity‚ and safe operation. We’ve designed this AC with user-friendliness in mind‚ but proper knowledge is key to unlocking its full potential.
Safety Precautions & Important Warnings
Important Safety Instructions: To prevent fire‚ electric shock‚ or injury‚ always follow these precautions. Never operate the unit with a damaged cord or plug. Avoid using extension cords. Ensure the unit is grounded properly.
Do not insert any objects into the air vents. Keep the unit away from flammable materials and water. Unplug the unit before cleaning or performing maintenance. This appliance is not intended for use by persons (including children) with reduced physical‚ sensory‚ or mental capabilities‚ or lack of experience and knowledge‚ unless supervised.
Package Contents & Parts Identification
Verify Contents: Upon opening the box‚ ensure all components are present. Your Hisense portable air conditioner package should include: the air conditioner unit itself‚ an exhaust hose‚ a window kit (including mounting plates and seals)‚ a remote control‚ and this user manual.
Part Identification: Familiarize yourself with each part. The unit features air intake vents‚ control panel‚ caster wheels‚ and a water drainage port. The window kit allows for secure exhaust venting. Carefully inspect all items for any shipping damage before proceeding with setup. Retain the packaging for potential future transport or warranty claims.
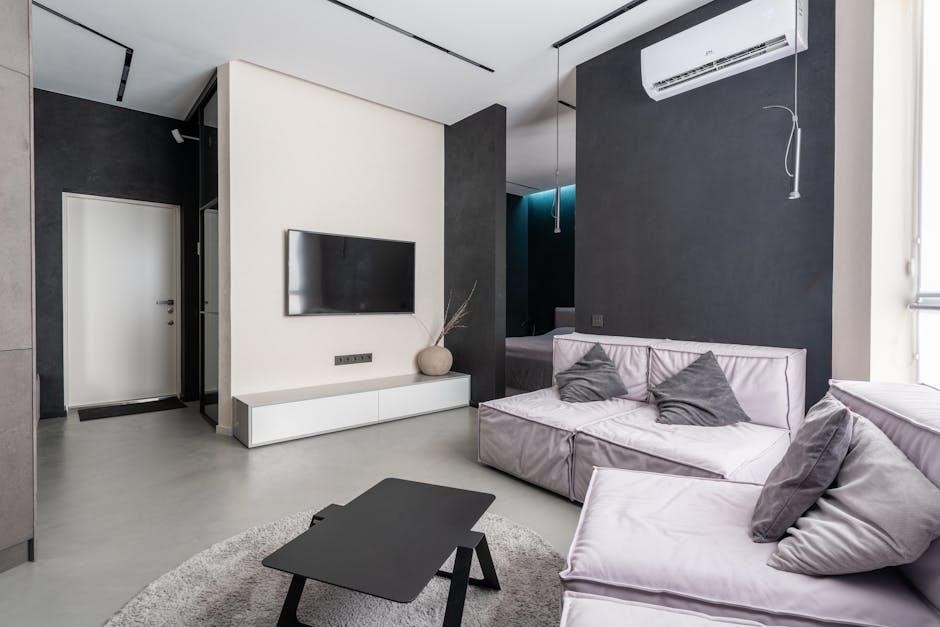
Air Conditioner Unit Overview
Key Features: The Hisense portable air conditioner is designed for convenient and efficient cooling. Its compact design allows for easy mobility between rooms‚ utilizing integrated caster wheels. The unit boasts a user-friendly control panel for direct operation‚ alongside a comprehensive remote control for added convenience.
Front & Rear Views: The front panel houses the air outlet and control display. The rear features air intake vents and the exhaust hose connection point. Proper ventilation around the unit is crucial for optimal performance. Ensure nothing obstructs these vents during operation for efficient cooling and energy use.
Exhaust Hose & Window Kit Components
Essential for Operation: The exhaust hose effectively vents hot air outside‚ crucial for the cooling process. The window kit facilitates secure installation in standard windows‚ preventing warm air from re-entering the room. Components include: an adjustable exhaust hose‚ window kit adapter plates‚ and sealing foam.
Proper Installation: Ensure a tight seal between the window kit and your window to maximize cooling efficiency. The adjustable hose length allows for flexible positioning of the unit. Regularly inspect the hose for kinks or damage‚ as this can reduce performance and potentially overheat the system.
Remote Control Functions
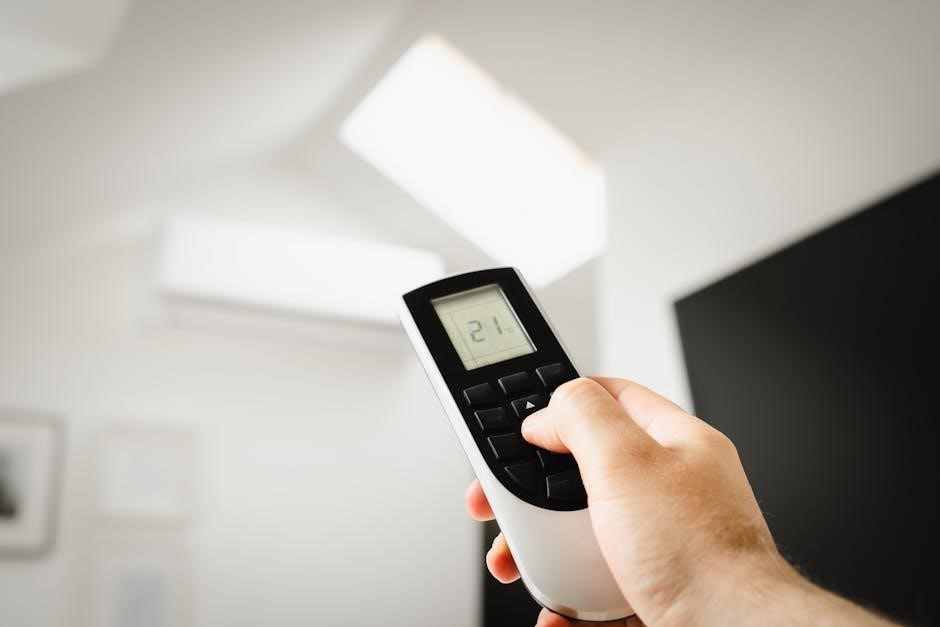
Convenient Control: Your Hisense portable AC’s remote offers effortless operation from anywhere in the room. Key functions include: Power On/Off‚ Mode Selection (Cool‚ Fan‚ Dehumidify‚ Auto‚ Sleep)‚ Temperature Adjustment (+/-)‚ Fan Speed Control (Low‚ Medium‚ High)‚ and Timer settings.
Additional Features: The remote may also include a ‘Swing’ function for adjusting the air vent direction and a ‘Turbo’ mode for rapid cooling. Ensure the remote is aimed directly at the air conditioner’s receiver for optimal responsiveness. Replace batteries promptly when the remote’s range diminishes.
Setting Up Your Air Conditioner
Initial Preparation: Before first use‚ carefully unpack your Hisense portable AC and inspect for any shipping damage. Place the unit on a firm‚ level surface‚ ensuring adequate space around it for proper ventilation – at least 16 inches clearance is recommended.
Kit Assembly: Locate the window kit and exhaust hose. The window kit is designed to fit most standard windows. Ensure the window is closed securely around the kit to prevent warm air from re-entering the room. Connect the exhaust hose to the unit and the window kit‚ tightening all connections firmly.
Installing the Window Kit
Window Type Compatibility: The Hisense window kit accommodates most standard double-hung or sliding windows. Measure your window opening to ensure the kit’s adjustable panels will fit securely. Panel Adjustment: Extend the side panels of the window kit to fill the window opening completely‚ minimizing gaps.
Secure Installation: Use the provided screws to firmly secure the window kit brackets to the window frame. Ensure a tight seal to prevent outside air infiltration. For sliding windows‚ adjust the kit’s height and width for a snug fit‚ prioritizing energy efficiency.
Connecting the Exhaust Hose
Hose Attachment: Firmly screw the exhaust hose onto the rear of the Hisense portable air conditioner unit. Ensure a clockwise rotation until tightly secured‚ preventing air leakage. Window Kit Connection: Connect the other end of the exhaust hose to the opening in the installed window kit.
Secure Fit: Tighten the connector on the window kit to create an airtight seal. Proper connection is crucial for efficient cooling and preventing hot air from re-entering the room. Regularly inspect the hose for any damage or disconnections.
Powering On & Initial Setup
Power Connection: Plug the Hisense portable air conditioner into a grounded electrical outlet. Avoid using extension cords or adapters. Initial Power-Up: Press the power button on the unit or the remote control to turn it on. The display panel will illuminate‚ indicating the unit is receiving power.
Mode Selection: Initially‚ the unit may default to a pre-set mode. Use the mode button to select your desired operating mode (Cool‚ Fan‚ Dry‚ Auto). Allow the unit several minutes to reach the set temperature before assessing performance.
Operating Modes Explained
Cool Mode: This mode actively cools the air to your desired temperature‚ utilizing the compressor and exhaust hose to remove heat. Adjust the temperature using the up/down buttons on the unit or remote. Fan Mode: Operates the fan without activating the cooling function‚ providing air circulation. Select fan speeds (Low‚ Medium‚ High) for customized airflow.
Dehumidifying Mode: Reduces humidity levels in the room‚ extracting moisture from the air. Auto Mode: Automatically adjusts cooling and fan speed based on room temperature. Sleep Mode: Gradually increases the set temperature overnight for comfortable sleep.
Cooling Mode
Activating Cooling: To initiate cooling‚ press the “Cool” button on the control panel or remote. Set your desired temperature using the “+” and “-” buttons; the display will show your selection. The unit will then begin cooling the room‚ automatically adjusting fan speed for optimal performance.
Temperature Range: Cooling mode typically operates within a temperature range of 61°F to 90°F (16°C to 32°C). Ensure the exhaust hose is properly connected for efficient heat removal. Adjust settings for personalized comfort and energy conservation.
Fan Mode
Utilizing Fan Mode: Press the “Fan” button on either the unit’s control panel or the remote control to activate this function. In Fan mode‚ the air conditioner circulates air without actively cooling it‚ providing ventilation and a refreshing breeze. You can select from multiple fan speeds – Low‚ Medium‚ and High – to customize airflow.
Benefits of Fan Mode: This mode is ideal for days when cooling isn’t necessary‚ but air circulation is desired. It consumes less energy than Cooling mode and helps distribute air evenly throughout the room‚ enhancing overall comfort.
Dehumidifying Mode
Activating Dehumidifying Mode: Select “Dry” or “Dehumidify” on the control panel or remote to initiate this function. This mode actively removes moisture from the air‚ reducing humidity levels without significantly lowering the room temperature. It’s perfect for damp environments or when you want to prevent mold and mildew growth.
Understanding Dehumidification: The unit extracts moisture‚ which is collected in the internal water tank. Regularly emptying the tank is crucial for optimal performance. Some models may offer continuous drainage options via a hose connection.
Auto Mode & Sleep Mode
Auto Mode: This intelligent function automatically adjusts cooling and fan speeds based on the room’s temperature. The unit continuously monitors and optimizes performance for consistent comfort‚ eliminating the need for manual adjustments. It’s ideal for maintaining a stable environment without constant intervention.
Sleep Mode: Activated via the remote‚ Sleep Mode gradually increases the temperature overnight‚ providing a comfortable sleeping environment while conserving energy. The fan speed is also reduced to minimize noise‚ ensuring undisturbed rest.
Maintenance & Cleaning
Regular maintenance ensures optimal performance and extends the lifespan of your Hisense portable air conditioner. Cleaning the air filter is crucial – a dirty filter restricts airflow and reduces cooling efficiency. We recommend cleaning it every two weeks during heavy use‚ or monthly with moderate use.
Periodically wipe down the unit’s exterior with a damp cloth. Before storing the unit for extended periods‚ ensure it’s completely dry to prevent mold growth. Proper cleaning contributes to healthier air quality and efficient operation.
Filter Cleaning Procedures
To clean the filter‚ first power off and unplug the air conditioner for safety. Locate the filter – usually behind the front grille – and gently slide it out. Use a vacuum cleaner with a brush attachment to remove loose dust and debris. For a deeper clean‚ wash the filter with mild soap and lukewarm water‚ ensuring it’s completely rinsed.
Allow the filter to air dry thoroughly before reinstalling it. Never operate the unit without the filter‚ as this can damage the internal components. Regular filter cleaning maintains optimal airflow and cooling performance.
Unit Cleaning & Storage
Before cleaning‚ always disconnect the power cord. Wipe the exterior with a damp‚ soft cloth – avoid harsh chemicals or abrasive cleaners. Empty the water tank completely to prevent mold growth. For long-term storage‚ ensure the unit is thoroughly dry. Remove the exhaust hose and window kit‚ storing them safely.
Cover the unit with a plastic bag to protect it from dust. Store in a cool‚ dry place away from direct sunlight. Periodically check the unit during storage to ensure no moisture buildup occurs‚ preserving its longevity.
Troubleshooting Common Issues
If your unit isn’t cooling‚ first check the filter for blockage and ensure the exhaust hose is properly connected and sealed. Verify the water tank isn’t full‚ as this can trigger a safety shut-off; For unusual noises‚ inspect for loose parts or obstructions within the fan. If the unit leaks water‚ ensure it’s level and the drain plug is securely fastened.
Consult the error code section for specific issues. Restarting the unit can often resolve minor glitches. If problems persist‚ contact Hisense customer support for assistance.
Error Codes & Their Meanings
“E1” indicates a sensor error‚ potentially requiring professional service. “E2” signals an issue with the compressor‚ often needing a qualified technician’s attention. “E3” suggests a full water tank‚ requiring drainage before resuming operation. “E4” points to a blocked exhaust hose‚ necessitating inspection and removal of any obstructions.
“E5” signifies a fan motor malfunction‚ potentially needing repair or replacement. Refer to the Hisense support website for a complete list and detailed troubleshooting steps for each error code. Always disconnect power before attempting any self-diagnosis.
Unit Not Cooling Properly
If your Hisense AC isn’t cooling‚ first ensure the exhaust hose is correctly connected and sealed‚ preventing warm air recirculation. Check the air filter for dirt and debris‚ cleaning or replacing it as needed for optimal airflow. Verify the cooling mode is selected and the desired temperature is set appropriately.
Confirm windows and doors are closed to maintain a cool environment. Inspect for obstructions around the unit’s intake and exhaust vents. If issues persist‚ consult the troubleshooting section or contact Hisense support for assistance.
Water Leaks & Drainage
Occasional water leakage during dehumidifying mode is normal due to condensation. Ensure the unit is positioned on a level surface to facilitate proper drainage. Regularly check the drainage port and empty the water tank when full‚ preventing overflow. Avoid tilting the unit during operation or transport‚ as this can cause spillage.
If excessive leakage occurs‚ inspect the hose connections and ensure they are secure. Contact Hisense support if the problem persists‚ as it may indicate an internal issue requiring professional attention.
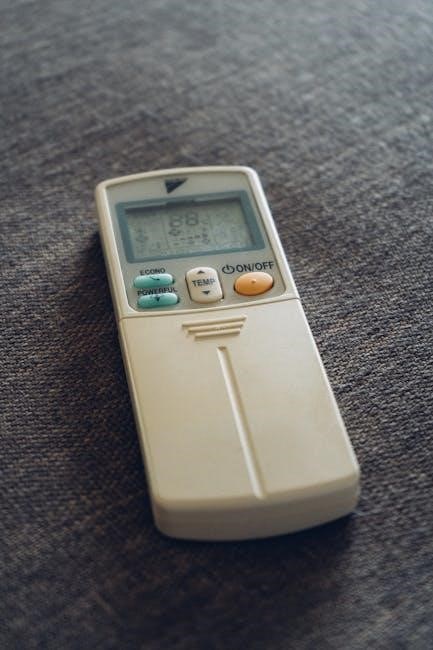
Remote Control Operation & Battery Replacement
Your Hisense remote allows convenient control of all air conditioner functions from a distance. Ensure clear line of sight between the remote and the unit’s sensor for optimal responsiveness. Press the power button to turn the unit on or off‚ and use the arrow keys to adjust temperature and fan speed;
To replace the batteries‚ open the battery compartment on the remote’s back. Insert two AAA batteries‚ matching the polarity markings (+ and -). Dispose of used batteries responsibly‚ following local regulations.
Technical Specifications & Energy Efficiency
This Hisense portable AC boasts impressive energy efficiency‚ designed to cool effectively while minimizing power consumption. Key specifications include cooling capacity (BTU)‚ power input (Watts)‚ voltage‚ and refrigerant type. The Energy Efficiency Ratio (EER) indicates cooling output versus energy used – a higher EER signifies greater efficiency.
Refer to the unit’s label and this manual for precise details. Proper usage and maintenance‚ like regular filter cleaning‚ contribute to sustained energy savings. Always operate within the specified voltage range for optimal performance and safety.