Welcome to the Oster Toaster Oven Manual, your guide to unlocking the full potential of your appliance. Discover features, installation, and operation tips for optimal cooking experiences.
1.1 Overview of the Oster Toaster Oven
The Oster Toaster Oven is a versatile and efficient kitchen appliance designed to simplify cooking while delivering professional-grade results. With its compact design, it offers a space-saving solution for baking, roasting, and toasting. The oven features a user-friendly interface and advanced cooking technologies, making it ideal for both novice and experienced cooks. Its robust construction ensures durability, while the sleek exterior complements any kitchen decor. Whether you’re preparing a quick snack or a gourmet meal, the Oster Toaster Oven provides consistent performance and versatility. This manual will guide you through its features, operation, and maintenance to ensure optimal use and longevity of your appliance.
1.2 Key Features and Benefits
The Oster Toaster Oven boasts a range of innovative features designed to enhance your cooking experience. Its digital control panel offers precise temperature and timer settings, ensuring accurate results. The oven includes multiple cooking functions such as baking, roasting, and toasting, catering to diverse culinary needs. Convection cooking technology circulates hot air for faster and evenly cooked dishes. Additional features like automatic shut-off and a non-stick interior provide safety and ease of cleaning. These benefits make the Oster Toaster Oven a versatile and efficient addition to any kitchen, allowing users to achieve professional-quality meals with minimal effort. Its compact size and modern design also make it a practical choice for home cooks seeking convenience and performance.

Installation and Setup
Installation and setup involve unboxing, placing the oven on a stable surface, connecting to power, and following initial calibration steps. Ensure electrical requirements are met for safe operation.
2.1 Unboxing and Initial Inspection
Begin by carefully unboxing your Oster Toaster Oven, ensuring all components are included and undamaged. Inspect the oven for any signs of shipping damage. Check for the power cord, baking pan, and rack. Ensure all accessories are accounted for and in good condition. Before plugging in, verify the oven’s exterior and interior for any defects or debris. Familiarize yourself with the control panel and features. This initial inspection ensures your appliance is ready for safe and proper use. If any issues are found, contact customer support immediately. Proper unboxing and inspection are crucial for a smooth setup process and optimal performance of your Oster Toaster Oven.

2.2 Placement and Electrical Requirements
Place your Oster Toaster Oven on a stable, heat-resistant surface, ensuring at least 4 inches of clearance on all sides for proper ventilation. Avoid positioning it near flammable materials or under cabinets. The oven should be kept away from children and pets to prevent accidental burns or damage. Ensure the power cord is placed safely, away from hot surfaces or sharp edges. Plug the oven into a dedicated 120V electrical outlet to avoid circuit overload. Do not use an extension cord, as it may cause electrical issues. Always follow the manufacturer’s guidelines for electrical connections to ensure safe and efficient operation. Proper placement and adherence to electrical requirements are essential for optimal performance and safety.
2.3 Initial Setup and Calibration
Before first use, ensure your Oster Toaster Oven is properly set up. Plug it into a dedicated 120V electrical outlet and allow it to preheat for 10 minutes to eliminate any manufacturing odors. Set the clock using the control panel and refer to the manual for specific instructions. Some models may require calibration to ensure accurate temperature control. Follow the calibration process outlined in the manual, which may involve adjusting the temperature sensor or running a test cycle. Proper setup and calibration are crucial for consistent cooking results. Always read the manual thoroughly and follow manufacturer guidelines to ensure safe and efficient operation. This initial setup will help you get the most out of your appliance and prevent potential issues down the line.
Understanding the Controls and Features
Explore the intuitive control panel, featuring an LCD display and multiple function buttons. Discover versatile cooking options and advanced settings designed for precision and ease of use.
3.1 Overview of the Control Panel
The Oster Toaster Oven features a user-friendly control panel designed for easy navigation. The panel includes a digital LCD display, function buttons, and a rotary dial for temperature and timer adjustments. Key components include buttons for selecting cooking modes (bake, roast, toast, convection), adjusting fan speed, and setting the timer. The LCD screen provides clear feedback on selected settings, ensuring precise control. Additional features like preset buttons for common tasks simplify the cooking process. The intuitive layout allows users to access advanced functions without complexity, making it suitable for both novice and experienced cooks. This section helps you familiarize yourself with the controls, enabling you to maximize the appliance’s capabilities for various recipes and cooking techniques.
3.2 Special Features and Settings
The Oster Toaster Oven boasts an array of special features designed to enhance your cooking experience. Convection cooking circulates hot air for even browning and faster results, while precision temperature control allows for accurate adjustments. The oven also includes pre-set settings for common tasks like toasting, baking, and roasting, ensuring optimal performance. Additional features such as delay start and keep warm functions offer flexibility for busy schedules. Some models may include advanced settings like slow cooking and dehydrating, expanding your culinary possibilities. These features, combined with an intuitive interface, make the Oster Toaster Oven a versatile and efficient kitchen companion, catering to both simple and complex recipes with ease.
Cooking Modes and Functions

The Oster Toaster Oven offers versatile cooking modes and functions, ensuring efficient and delicious results for various recipes, from baking to roasting and toasting with precision.
4.1 Baking Mode
The Baking Mode on your Oster Toaster Oven is designed for precise temperature control, ensuring even cooking for cakes, cookies, and bread. This mode allows you to set specific temperatures and timers, making it ideal for delicate recipes. The oven’s advanced heating elements distribute heat uniformly, preventing hot spots and promoting consistent results. For best outcomes, use baking pans recommended in the manual and follow recipe guidelines. The Baking Mode is also energy-efficient compared to traditional ovens, reducing cooking time and power consumption. Always refer to the manual for specific temperature and timing recommendations to achieve perfect baked goods. Remember to preheat the oven before starting and ensure proper ventilation for safety.
4.2 Roasting Mode
The Roasting Mode on your Oster Toaster Oven is perfect for achieving tender, flavorful results with meats, poultry, and vegetables. This mode uses high heat to lock in juices and create a crispy exterior. For optimal results, place food in the roasting pan provided and set the temperature and timer according to the manual’s guidelines. The oven’s convection technology ensures even browning and caramelization. Always preheat the oven before roasting and use the rack for proper air circulation. For larger cuts of meat, consider using a food thermometer to ensure internal temperatures meet safety standards. Roasting Mode is ideal for dishes like roasted chicken, beef, or vegetables, delivering restaurant-quality results in the comfort of your home.
4.3 Toasting Mode

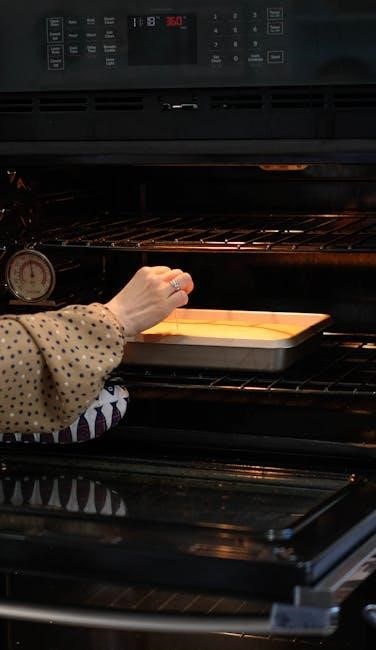
The Toasting Mode on your Oster Toaster Oven is designed for perfectly browning slices of bread to your desired crispiness. This mode is ideal for making toast, bagels, or English muffins. Simply place your bread slices on the oven rack, select the toasting mode, and adjust the browning level using the control panel. The oven will evenly heat the bread for consistent results. For optimal performance, ensure the rack is properly positioned and clean any crumbs after use to prevent burning. The Toasting Mode is a convenient and efficient way to enjoy your favorite breakfast items without the need for a separate toaster. Always refer to the manual for specific temperature and timing recommendations to achieve the perfect toast every time.
4.4 Convection Cooking Mode
The Convection Cooking Mode on your Oster Toaster Oven utilizes a built-in fan to circulate hot air evenly around your food, ensuring faster and more uniform cooking. This mode is ideal for roasting meats, baking vegetables, and cooking dishes that require crisp textures. To activate, select the convection setting on the control panel and adjust the temperature and timer as needed. The fan enhances heat distribution, reducing cooking time by up to 30% compared to traditional methods. For best results, preheat the oven before use and ensure proper air circulation around the food. Avoid overcrowding the rack to maximize the convection effect. This mode is perfect for achieving professional-quality results in the comfort of your home. Explore its potential for a variety of delicious recipes and cooking experiments.
Safety Precautions and Tips
Always unplug the oven when not in use and avoid overheating. Keep children away and use oven mitts to handle hot surfaces. Ensure proper ventilation and follow manual guidelines for safe operation.
5.1 General Safety Guidelines
To ensure safe operation of your Oster Toaster Oven, always follow these guidelines:
- Unplug the oven when not in use to prevent accidental start-ups.
- Avoid overheating by not leaving the oven unattended during operation.
- Keep children away from the appliance to prevent burns or injuries.
- Use oven mitts or tongs to handle hot cookware and food.
- Ensure proper ventilation in the kitchen to avoid smoke buildup.
- Never insert metal utensils or foreign objects into the oven.
- Regularly inspect the power cord and plug for damage.
- Follow the manual’s instructions for cleaning and maintenance.
By adhering to these guidelines, you can enjoy safe and efficient cooking with your Oster Toaster Oven.
5.2 Avoiding Common Hazards
To ensure safe usage of your Oster Toaster Oven, it’s crucial to avoid common hazards:

- Avoid direct contact with hot surfaces, as they can cause severe burns.
- Keep the oven away from flammable materials like curtains or towels.
- Prevent children from touching the appliance or its controls.
- Never leave cooking unattended, especially when using the toasting or convection modes.
- Use oven-safe cookware to prevent explosions or melting.
- Ensure the oven is placed on a stable, heat-resistant surface.
- Avoid overloading the oven, as this can lead to uneven cooking or damage.
- Regularly clean food residue to prevent smoke and potential fires.
By following these precautions, you can minimize risks and enjoy a safe cooking experience with your Oster Toaster Oven.

Maintenance and Cleaning

Regular maintenance and thorough cleaning are essential for prolonging the life of your Oster Toaster Oven. Clean the exterior, interior, and accessories regularly to prevent food residue buildup and ensure optimal performance.
6.1 Cleaning the Exterior and Interior
Regular cleaning of your Oster Toaster Oven is essential for maintaining its performance and hygiene. Start by unplugging the appliance to ensure safety. For the exterior, use a soft, damp cloth to wipe down the surfaces, paying attention to knobs and handles where grease may accumulate. Avoid using abrasive cleaners or scrubbers, as they can damage the finish. For the interior, remove racks and trays and wash them with mild soap and warm water. Use a gentle scrubber to remove food residue from the oven walls and floor. Avoid spraying water directly into vents or electrical components. Dry all parts thoroughly before reassembling. Regular cleaning prevents food buildup and ensures optimal cooking results. Always refer to the manual for specific cleaning recommendations to maintain your oven’s longevity.
6.2 Replacing Parts and Accessories
Replacing parts and accessories for your Oster Toaster Oven is straightforward when done correctly. Always unplug the appliance before starting any replacement to ensure safety. For racks, trays, or pans, simply remove the old ones and install the new ones, ensuring they fit securely. Heating elements or other internal components may require more care and should be replaced with genuine Oster parts to maintain performance and safety. Refer to the manual for specific instructions on removing and installing complex parts. Clean the area thoroughly before reinstalling any components. For accessories like rotisserie kits or baking pans, purchase them from official Oster retailers to guarantee compatibility. Regularly inspect and replace worn-out parts to maintain your oven’s efficiency and longevity. Always follow the manufacturer’s guidelines to avoid damage or safety hazards.

Troubleshooting Common Issues
Identify and resolve common issues with your Oster Toaster Oven, such as uneven heating or malfunctioning controls, by referring to the manual for detailed solutions and guidance.
7.1 Identifying and Solving Common Problems
Common issues with your Oster Toaster Oven may include uneven heating, malfunctioning controls, or unexpected shutdowns. Start by ensuring the appliance is properly plugged in and the outlet is functioning. Check for food residue or debris that might block heating elements or vents. If the display is unresponsive, try resetting the oven by unplugging it for 30 seconds. For temperature inaccuracies, calibrate the oven as outlined in the manual. If problems persist, consult the troubleshooting section or contact customer support for assistance. Regular maintenance, such as cleaning and updating settings, can prevent many issues. Always refer to the manual for specific guidance tailored to your model.
7.2 Resetting the Appliance
To reset your Oster Toaster Oven, unplug it from the power source and wait for 30 seconds. This simple step can resolve issues like malfunctioning controls or incorrect display readings. Plug the oven back in and test its functionality. If the problem persists, ensure all settings are restored to factory defaults. Refer to the manual for specific reset procedures, as some models may have additional steps. Resetting can help address software glitches without affecting saved preferences. If the issue remains unresolved, consult the troubleshooting guide or contact customer support for further assistance. Regular resets can help maintain optimal performance and prevent unexpected errors.
Conclusion and Final Thoughts
Mastering your Oster Toaster Oven is now within your reach! This manual has provided a comprehensive guide to understanding and optimizing your appliance. From installation to advanced cooking modes, you’ve learned how to harness its full potential. Regular maintenance and adherence to safety guidelines will ensure longevity and performance. Experiment with new recipes and explore the versatility of your oven to elevate your culinary skills. For any unresolved issues, refer to the troubleshooting section or contact customer support. With proper care and use, your Oster Toaster Oven will remain a reliable and indispensable kitchen companion for years to come. Happy cooking!